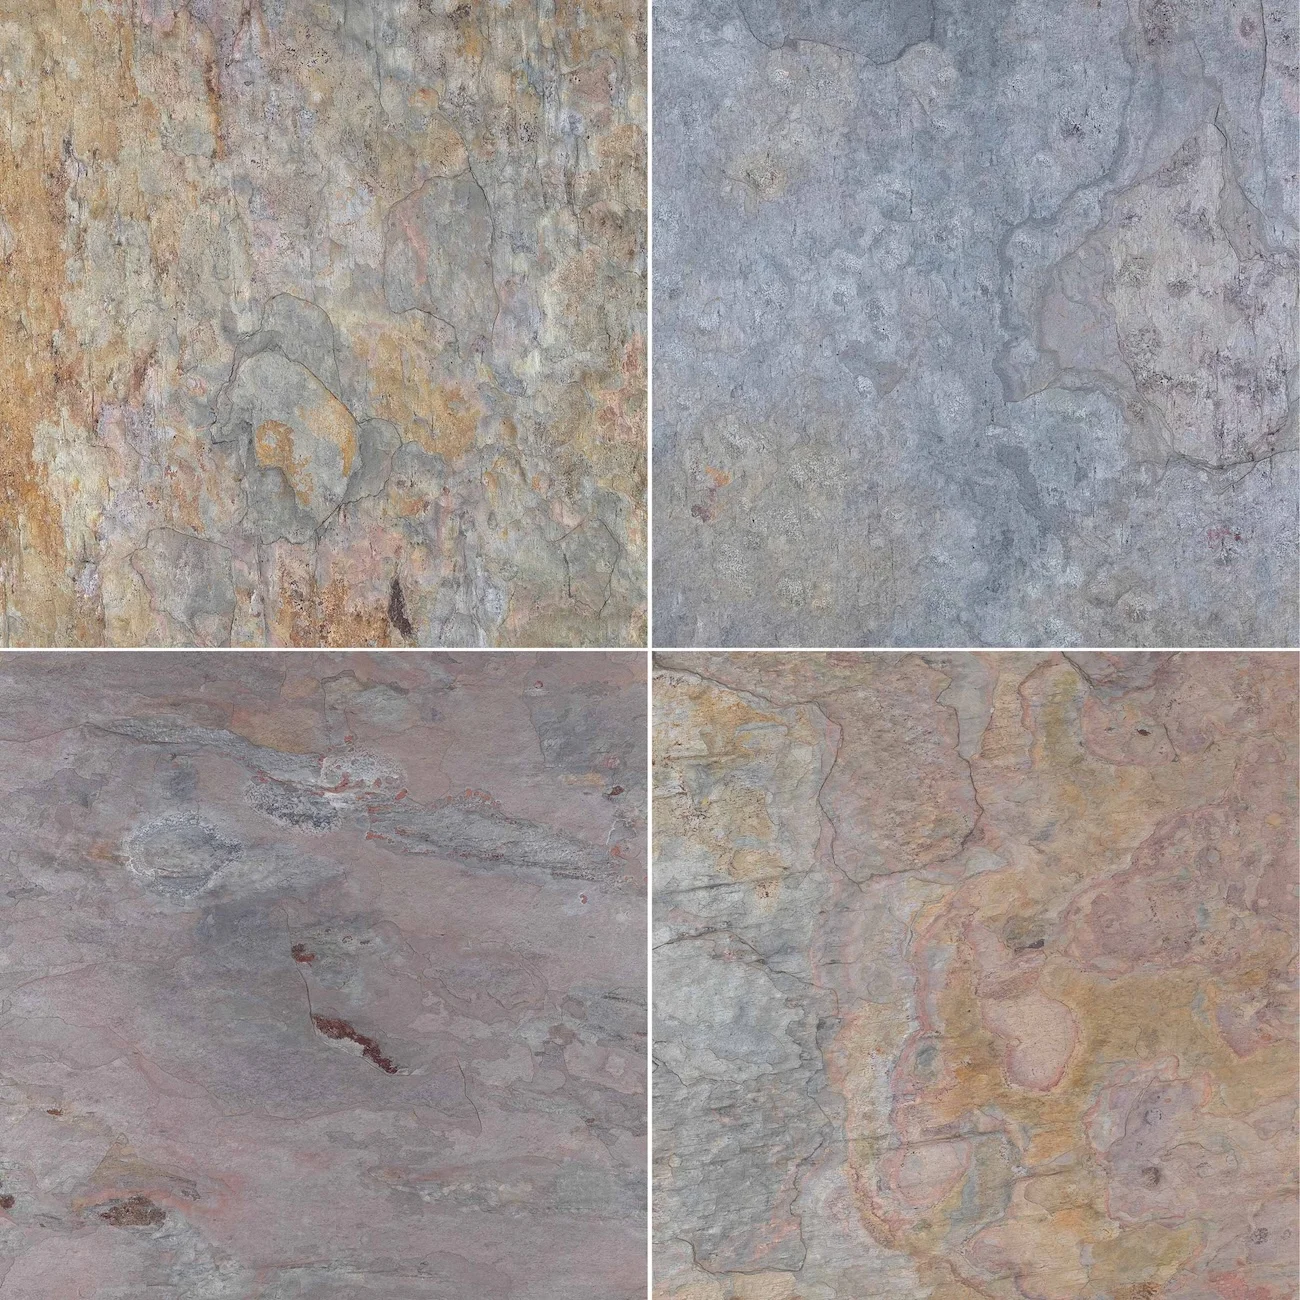
Know How To Lay Slate Floor Tiles

Know How To Lay Slate Floor Tiles

06 Nov 2023

Table Of Contents

In these modern times, a stunning feature that may give character and value to various interior and outdoor locations is a Slate tile floor. The metamorphic rock known as slate is what gives mountains their bellies. Every tile in these unique pieces has unique characteristics that can add visual intrigue and appeal.

Know About Slate Tiles

Due to its softer nature, slate is prone to scratching, a prevalent issue with these floors. However, it's still excellent for use in restrooms and kitchens. Steer clear of utilising it on heavily trafficked floors like those in garages or warehouses. Slate's comparatively high cost of procurement and skilled installation—which doubles the cost of other flooring—is another prevalent issue with the material. You might be so taken aback by the sticker shock that you decide to learn how to install slate yourself.

But doing it yourself might be an intimidating physical challenge. Sophistication, brute force, and excruciating labour are needed to move, set, and arrange every component precisely. Consider carefully how much time and attention you can devote to this job. Regarding your skill level, be reasonable; you may need to use a wet saw and other tools that may require some training.

Read on!

How to Install Slate Tiles

Prepare the Area: Preparing the surface completely before beginning the installation of Slate tiles is essential. Ensure the space is tidy and devoid of dust, filth or clutter before starting. To provide a consistent and sturdy base for the tiles, evaluate the surface's levelness next.

Any inconsistencies or uneven regions should be fixed to avoid such issues in the future. Furthermore, clear away any obstacles that could make installation more difficult. A beautiful and durable completed surface is produced when the slate tiles are installed with stability and flatness, which is made possible by adequate preparation.

Establish Reference Lines: Utilising a tape measure, locate the exact centre of the room's longest wall to obtain reference lines. You can use a store pencil to mark this close to the floor. Then repeat the process on the wall next to you. Then, drawing a temporary path that should entirely divide the area, use the two markers as your reference and snap a chalk line between them.

Measure the exact centres of the other two neighbouring walls in the room and repeat this method to create a line chalk snap between them. This should create four equal quadrants in the area, with a cross in the precise middle of each.

You can measure the angle with a T square to ensure the two lines are perpendicular. As an alternative, you can apply the 3, 4, 5 strategy: In order to accomplish this, measure the two lines to be 3 inches and 4 inches from the centre, respectively, and ensure that the third line is 5 inches long.

Lay Out Tiles in a Dry Run: Slate is a special kind of substance that can be challenging at times. This is particularly valid when utilising choices with several colours. It will be helpful to lay out the tiles in the room and arrange them so that the resulting colours and patterns come together to form a visually appealing whole before moving forward. This allows you to assemble everything like a master puzzle before using glue and mortar to commit to a particular style.

Once you're happy, arrange the tiles into separate piles that will stay in the original order that they were laid. Try your best not to let them brush against one another and cause any scratches as you stack them face to face and back to back.

Spread the Mortar: When you're ready to start, combine the mortar in a plastic bucket according to the manufacturer's recommended ratio of water to material. Mix the contents with a wooden paint stick until they feel uniform. Avoid mixing more mortar than you will need for a project that will take 20 to 30 minutes or longer, since it may begin to dry out and solidify before you can use it.

Scoop up some mortar with the flat end of the notched trowel and start spreading it onto the cement board, going across one quadrant starting in the centre of the cross point chalk line you made. Apply just enough to exceed the amount required for one Slate tile slightly.

Next, make grooves in the mixture using the trowel's notched edge to give the slate tile a stronger hold when installed.

Set the Tiles: After spreading enough mortar, grab the first tile and press it firmly into the bed of glue. This initial tile's corner should align with two of the chalk lines in the middle of the first quadrant you made in the room's division.

Don't use so much force that you fall to the cement board below, but just enough to cause the notched lines you made earlier to collapse. To make the tile grip more firmly, twist it slightly. If you think more pressure is required, tap the piece with a rubber mallet.

Take care to prevent any mortar from getting on the piece's surface. If so, remove it right away using a moist cloth.

Insert Tile Spacers: Install tile spacers around each of the four corners after a piece is in place. As a result, there will be regular spaces between the tiles, eventually becoming even and straight grout lines.

Apply additional mortar, following the chalk line, and position a second tile adjacent to the first. Add extra tile spacers to the open edges of this piece. This procedure goes back to back until you get to the distant wall.

Level the Tiles: After three or more tiles are in place, you can smooth them out dimensionally by covering the surface of each tile with a piece of 2 x 4 wood covered in leftover carpet. Use a rubber mallet to gently tap this to ensure no component is higher than the others.

You might want to skip this step if you are working with a slate that is very dimensional and has a lot of peaks and spaces. Inconsistencies in height might result from irregularities in the material. If so, try your best to judge each piece's relative depth by eye.

Cut Edge and Corner Tiles: You will frequently have a gap once the first row of slate tiles touches the wall. Calculate the room length starting at the tile spacer on the final piece. Next, use a wet saw to trim a tile to the exact size required to cover that space. To finish your first line, insert the precisely sized piece into the available spot.

You can start at the first tile that is put and repeat the entire process, installing the second tile into the mortar just next to it. To guarantee uniform grout lines, use tile spacers and proceed downward, using the top row as a reference.

Allow the Mortar to Dry: Give the mortar adhesive at least 40 hours to dry after the tiles are in place. This process can be sped up by keeping the area well-ventilated with fans and open windows. The package from the manufacturer may sometimes specify that it takes longer to fully set. It is important to always adhere to their directions and prevent foot traffic on the floor until the installation has solidified.

Seal the Tile: Since slate is a naturally porous stone, a high-quality sealer is needed. Remove any extra mortar that might have gotten on the surface once it has cured. Next, seal the entire installation to block the pores and form an imperceptible shield.

Apply a below-surface sealing agent first, so that it can enter the small holes in the stone and obstruct them. Pour this mixture into an old coffee can and use a tiny foam brush to apply it evenly and thinly across the tiles. Keep it from bubbling up or building up into puddles. If this happens, remove the puddles using a dry foam brush.

After a few minutes of drying time, apply a layer of above-surface sealer. This will give the stone additional protection by forming an invisible but strong barrier on top of it.

Before moving on to the following stage, allow the sealant to completely dry and set into the stone, which should take one to two hours.

Lay the Grout: Use a plastic bucket to mix a tiny amount of grout, making sure to follow the manufacturer's directions and water-to-material ratios. A great consistency that isn't too thick or soupy is what you want to make sure the mix has.

Apply a tiny quantity of grout to the line gaps you made between the tiles by using spacers to scoop up some grout with your grout float. Beginning at one of the distant walls, proceed down each line while maintaining a 60-degree angle and carefully packing as much material as you can into the spaces.

Remove Excess Grout: To remove any leftover grout that may have accumulated, rub a wide sponge over the slate floor until it is damp but not completely saturated. Avoid getting the installation overly wet since too much moisture might seep into the grout's crevices and produce a muddy mess.

Give the grout at least four hours to dry thoroughly. Next, do it again with a fresh sponge, removing any residue from your work. Wiping up any extra liquid that may accumulate and aiding in cleansing can be accomplished with a soft cloth.

You must follow These tips and guidelines to lay Slate tiles. However, do consult your installer for a clearer picture.

*Disclaimer: All information and advice given above in the blog are to the best of our knowledge. Please reconfirm at your end before execution.

Launching a Project? Reach Out for Expert Stone Solutions!

Contact us to tailor stone solutions for your upcoming project.

*Disclaimer: All information and advice given above in the blog are to the best of our knowledge. Please reconfirm at your end before execution.

Related Posts & Blogs

Stay updated on the latest trends and expert tips on product care through our latest articles. There is a lot from renovation ideas to DIY maintenance and more.

30 Mar 2023

How to Lay Crazy Paving: Tips and Tricks

If you want to do something characteristic with natural stone, Crazy Paving is an excellent option....

Read More

31 Mar 2023

How To Lay Bluestone Pavers: Tips and Tricks

It is one of the most popular choices that beautifully blends contemporary architecture with treasured collect...

Read More

12 Apr 2023

How to Install Pavers? Know The Tips and Tricks

Pavers are an easy way for homeowners to add aesthetics to their outdoor areas and add value to their homes....

Read More

18 Aug 2021

How to lay Travertine Pavers around pool

Travertine pavers' installation around pools is not a complicated process....

Read More

whatsapp-widget-icon