Patio, courtyard, deck, or walkways made from Limestone pavers undoubtedly look stunning. Limestone not just elevates the aesthetics of outdoor spaces but also brings in incredible durability and solidity that leave you amazed. Limestone paving is known for its robustness, as it's less likely to chip, crack or break. The pavers have a smooth texture that gives a visual continuity. Additionally, Limestone pavers have incredible insulating properties which means it remains cool in summers and doesn't get too cold in winters either.
However, don't you wonder, how to lay these beautiful pavers in your home's outdoor space? Here we share a few easy tips and tricks to install Limestone pavers on your own:
Prepare the area
Once you have identified where will the pavers be installed, start marking the perimeter of the area for paving. Either use spray paint or use wooden stakes and string to mark the border. With a spade to cut out the border and remove the soil or grass from the space. Please keep in mind that the base should have a slight slope to prevent water stagnation. Hence examine the soil beneath the sod. If the soil is firm, you need not remove anything from the area. However, if the soil is moist, you'd be required to remove four inches of soil from the area and fill it with gravel to offer good drainage. Tamp the gravel with a hand tamper or plate compactor to even the area.
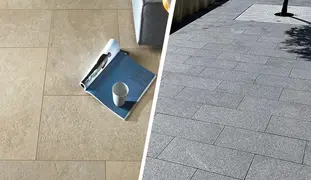
Laying the paver base
You would require weed-blocking fabric to cover the designated area. Additionally, you'd need one cubic foot of sand for every four square feet of the outdoor area. Now lay the fabric over the ground within the marked area and cover it with sand. The sand should be smooth and levelled. With a garden hose wet the sand so that it doesn't move around. Let the sand dry before you wet it again. Continue with the wetting process until the sand is fully compact. Let the sand dry completely in the final stage.
Installing Limestone Pavers
Before you lay the Limestone pavers, arrange them together in a pattern that you want to create. Start placing them on the sand bed created, leaving about an inch of space between each. Please note, not to disturb the sane during the placement of the paving stones. Start from one corner till you cover the whole area. Tap each paver gently with a rubber mallet. If the pavers do not fit in the gaps, cut them with a brick-set tool.
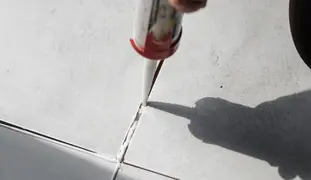
Mortar and drying
Allow the mortar to dry for about 24 hours so that the pavers are set in. Now mix five parts mortar whhh one part water. Start spreading the mortar mix in between the gaps of the Limestone pavers with a trowel. Wipe off excess from the pavers with the trowel to avoid staining the stones. Allow the area to dry for about 48 hours before using it.
Tip- It takes around 3-4 days to install Limestone Pavers in the space, of course depending on the area size. If you get professional help, the time
Summing up
Limestone pavers are best suited for large outdoor spaces which need visual uniformity. Large courtyards, porches, and even driveways are made of Limestone. The natural stone's surface has a non-slip base and it can be fitted in the patio area, pool areas, or gardens. Apart from this, this stone is frost-resistant and prevents frost damage in winter. Limestone pavers are standard for garden paving because you can install this stone on the pathway, or you can also design the garden with a step-paving system. Few gardens with small stairs often get slime layers after some time. In such a case, you can design these stairs with limestone to prevent moisture and maintain the beauty of your landscaping.To build serene outdoor spaces, you can go with the lighter coloured ones like Navona or Indiana White Limestone. For darker tones, we have options like Tandur Grey and Midnight Glow. Whatever Limestone you choose, the smooth texture and soft colours make it a popular choice for residential outdoor projects.
*Disclaimer: All information and advice given above in the blog are to the best of our knowledge. Please reconfirm at your end before execution.